By Ben Nitkin on

Good news and bad news. I'll start with the good news.
Good: Heated Print Bed
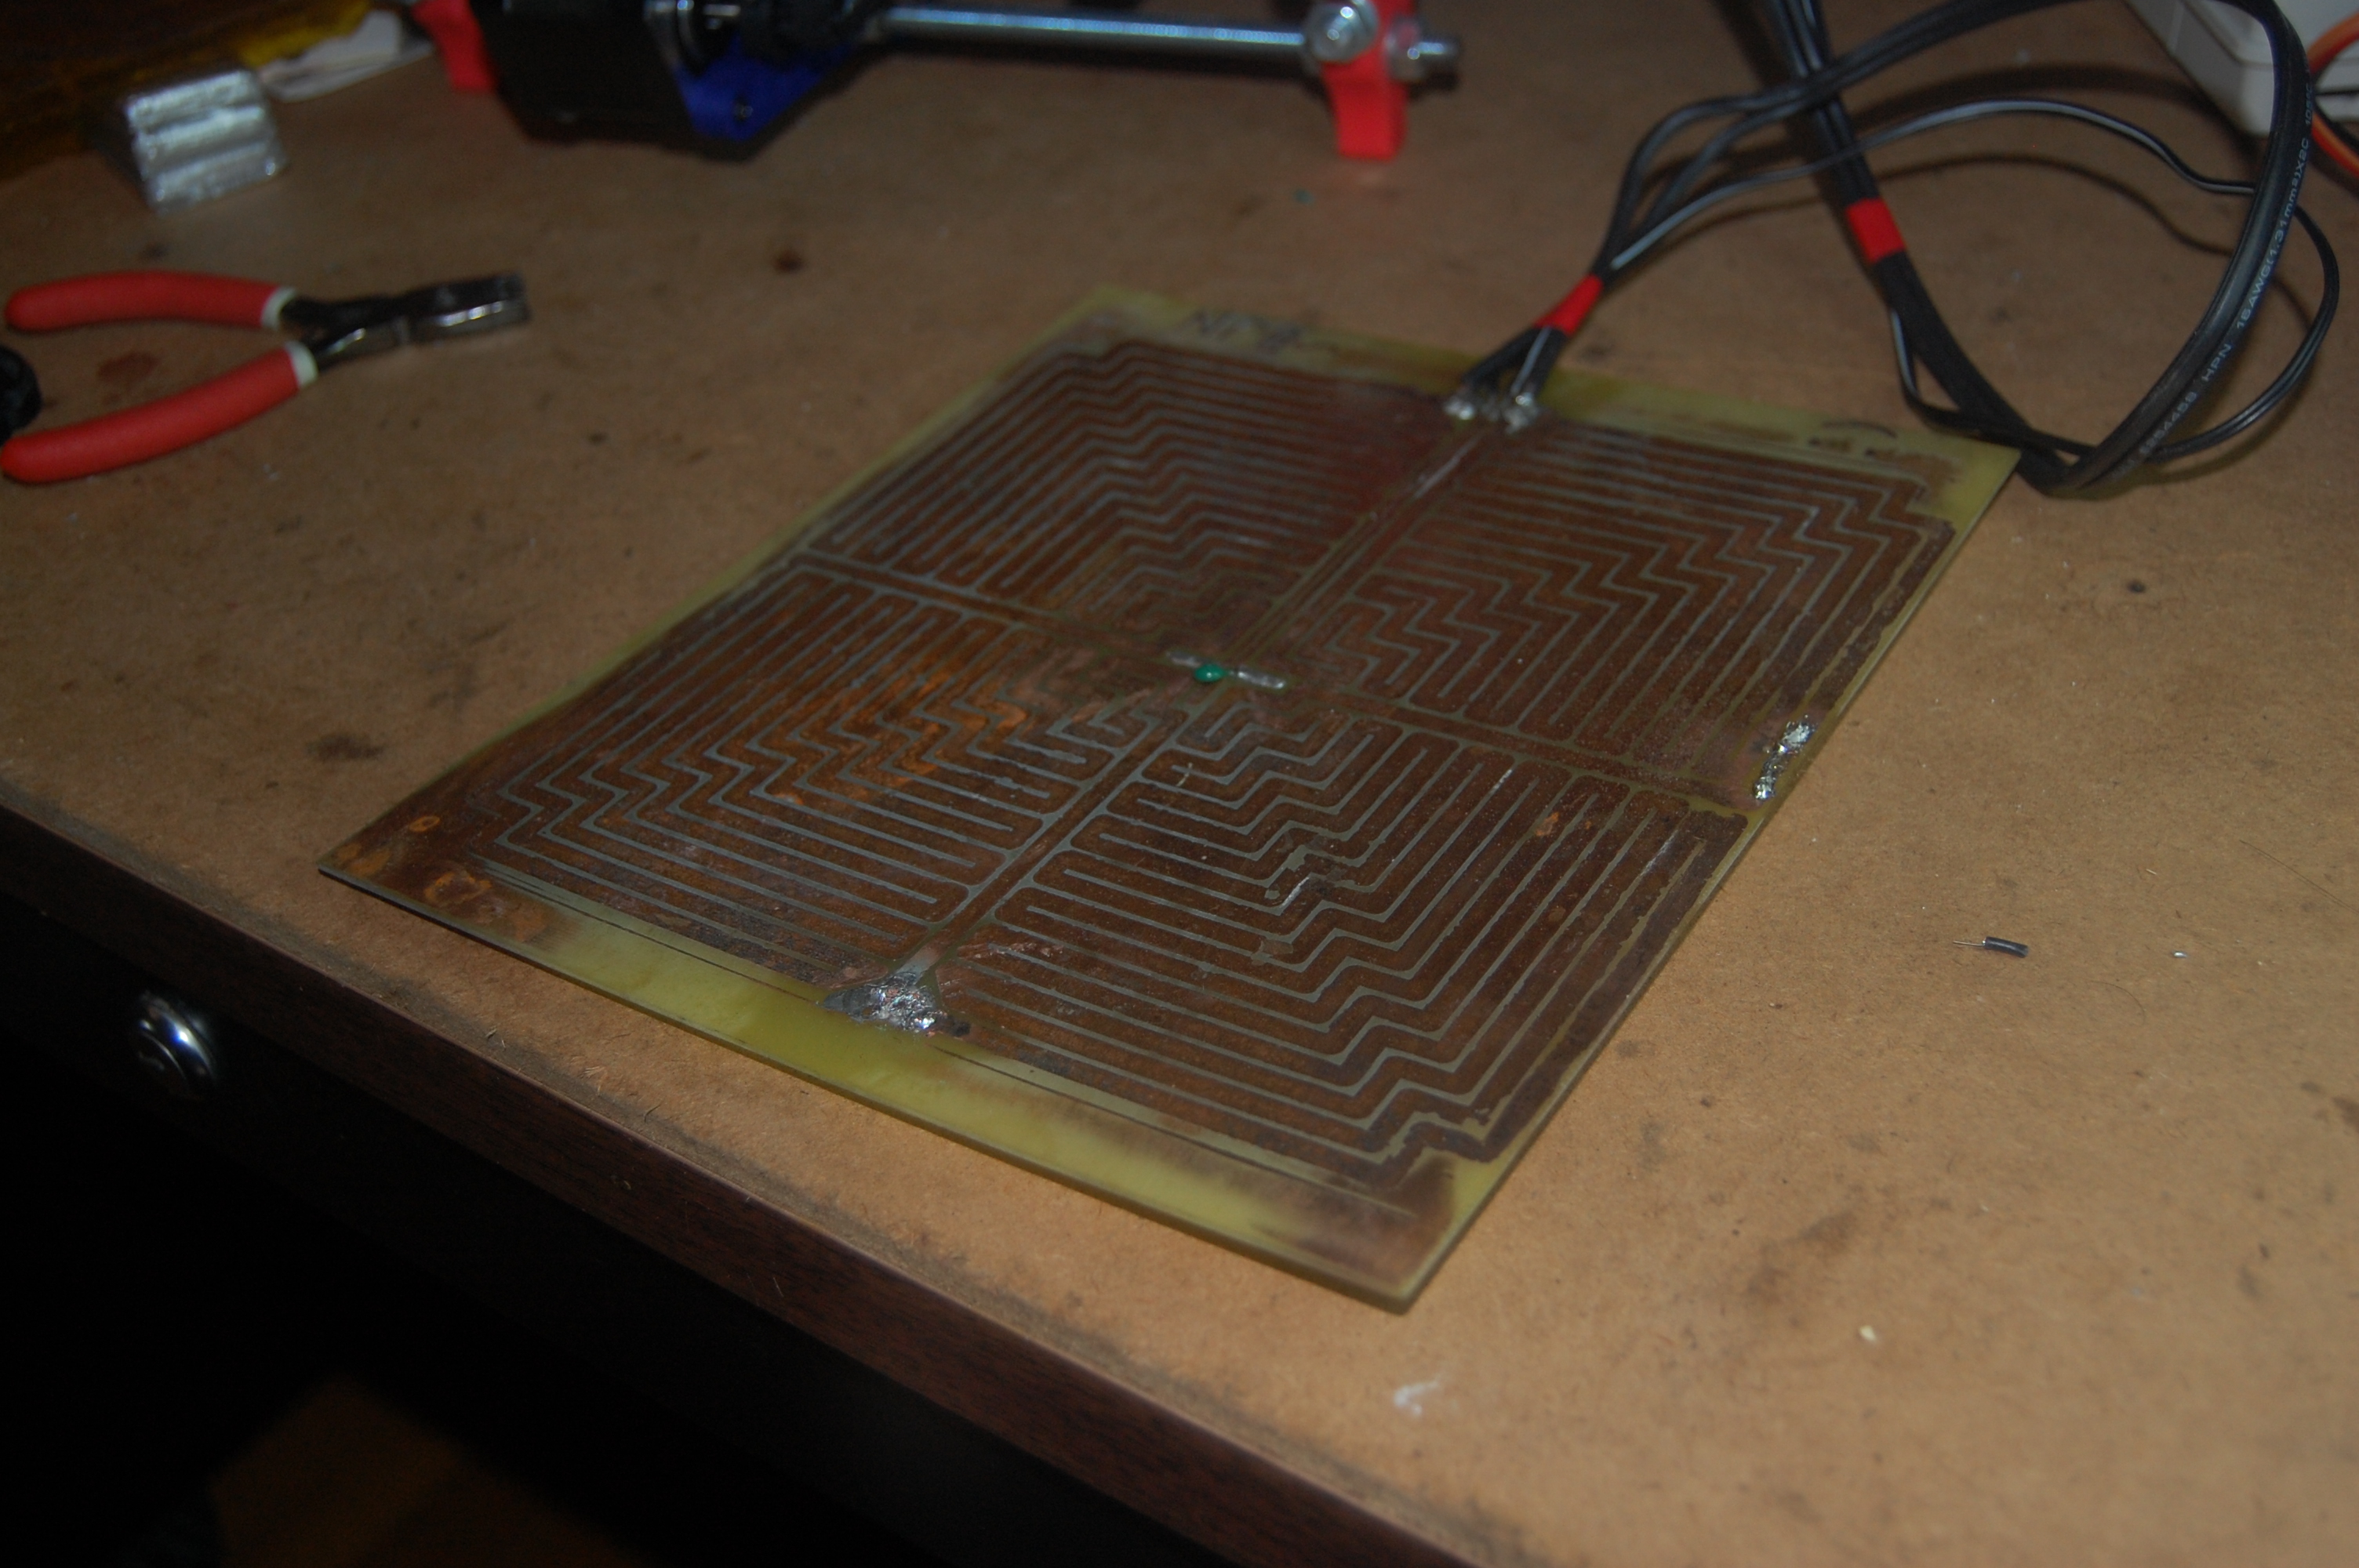
In the process of polishing the Reprap, I dediced to make a heated print bed. These beds improve print quality by helping the plastic adhere to the bed. During the build, the lowest layers of plastic are warmed by the plate. As the plastics cool, they shrink and detach from the bed. A heated bed prevents that shrinkage.
I found a template for a bed by on thingiverse. This pattern was slightly smaller than others, and printed on letter size paper. After much trouble, I managed to transfer toner onto the board as a resist. My method:
- Mirror the pattern horizontally
- Use a laser printer to print the pattern onto magazine paper. Magazine paper practically dissolves in water, so it's easy to divorce the paper from the toner layer.
- Preheat the board with an iron set to its maximum heat, then align and iron the pattern onto the board. (Ironing for around 30 seconds worked fairly well)
- Allow the board to cool, then soak it in water. Once the magazine rag is soggy, massage the paper off.
I first tried etching with 50/50 mixture of vinegar and H2O2 (hydrogen peroxide; as suggested by blondihacks), but didn't get very far. The solution turned blue (indicating copper salts), but the copper layer persisted on the board. I think that the solution worked, but the acetic acid was depleted before etching finished. Additionally, the toner came up after extended exposure to the solution. The completed board shows several thicknesses of copper; I suspect that the thinner areas were eaten by the vinegar after the toner released.
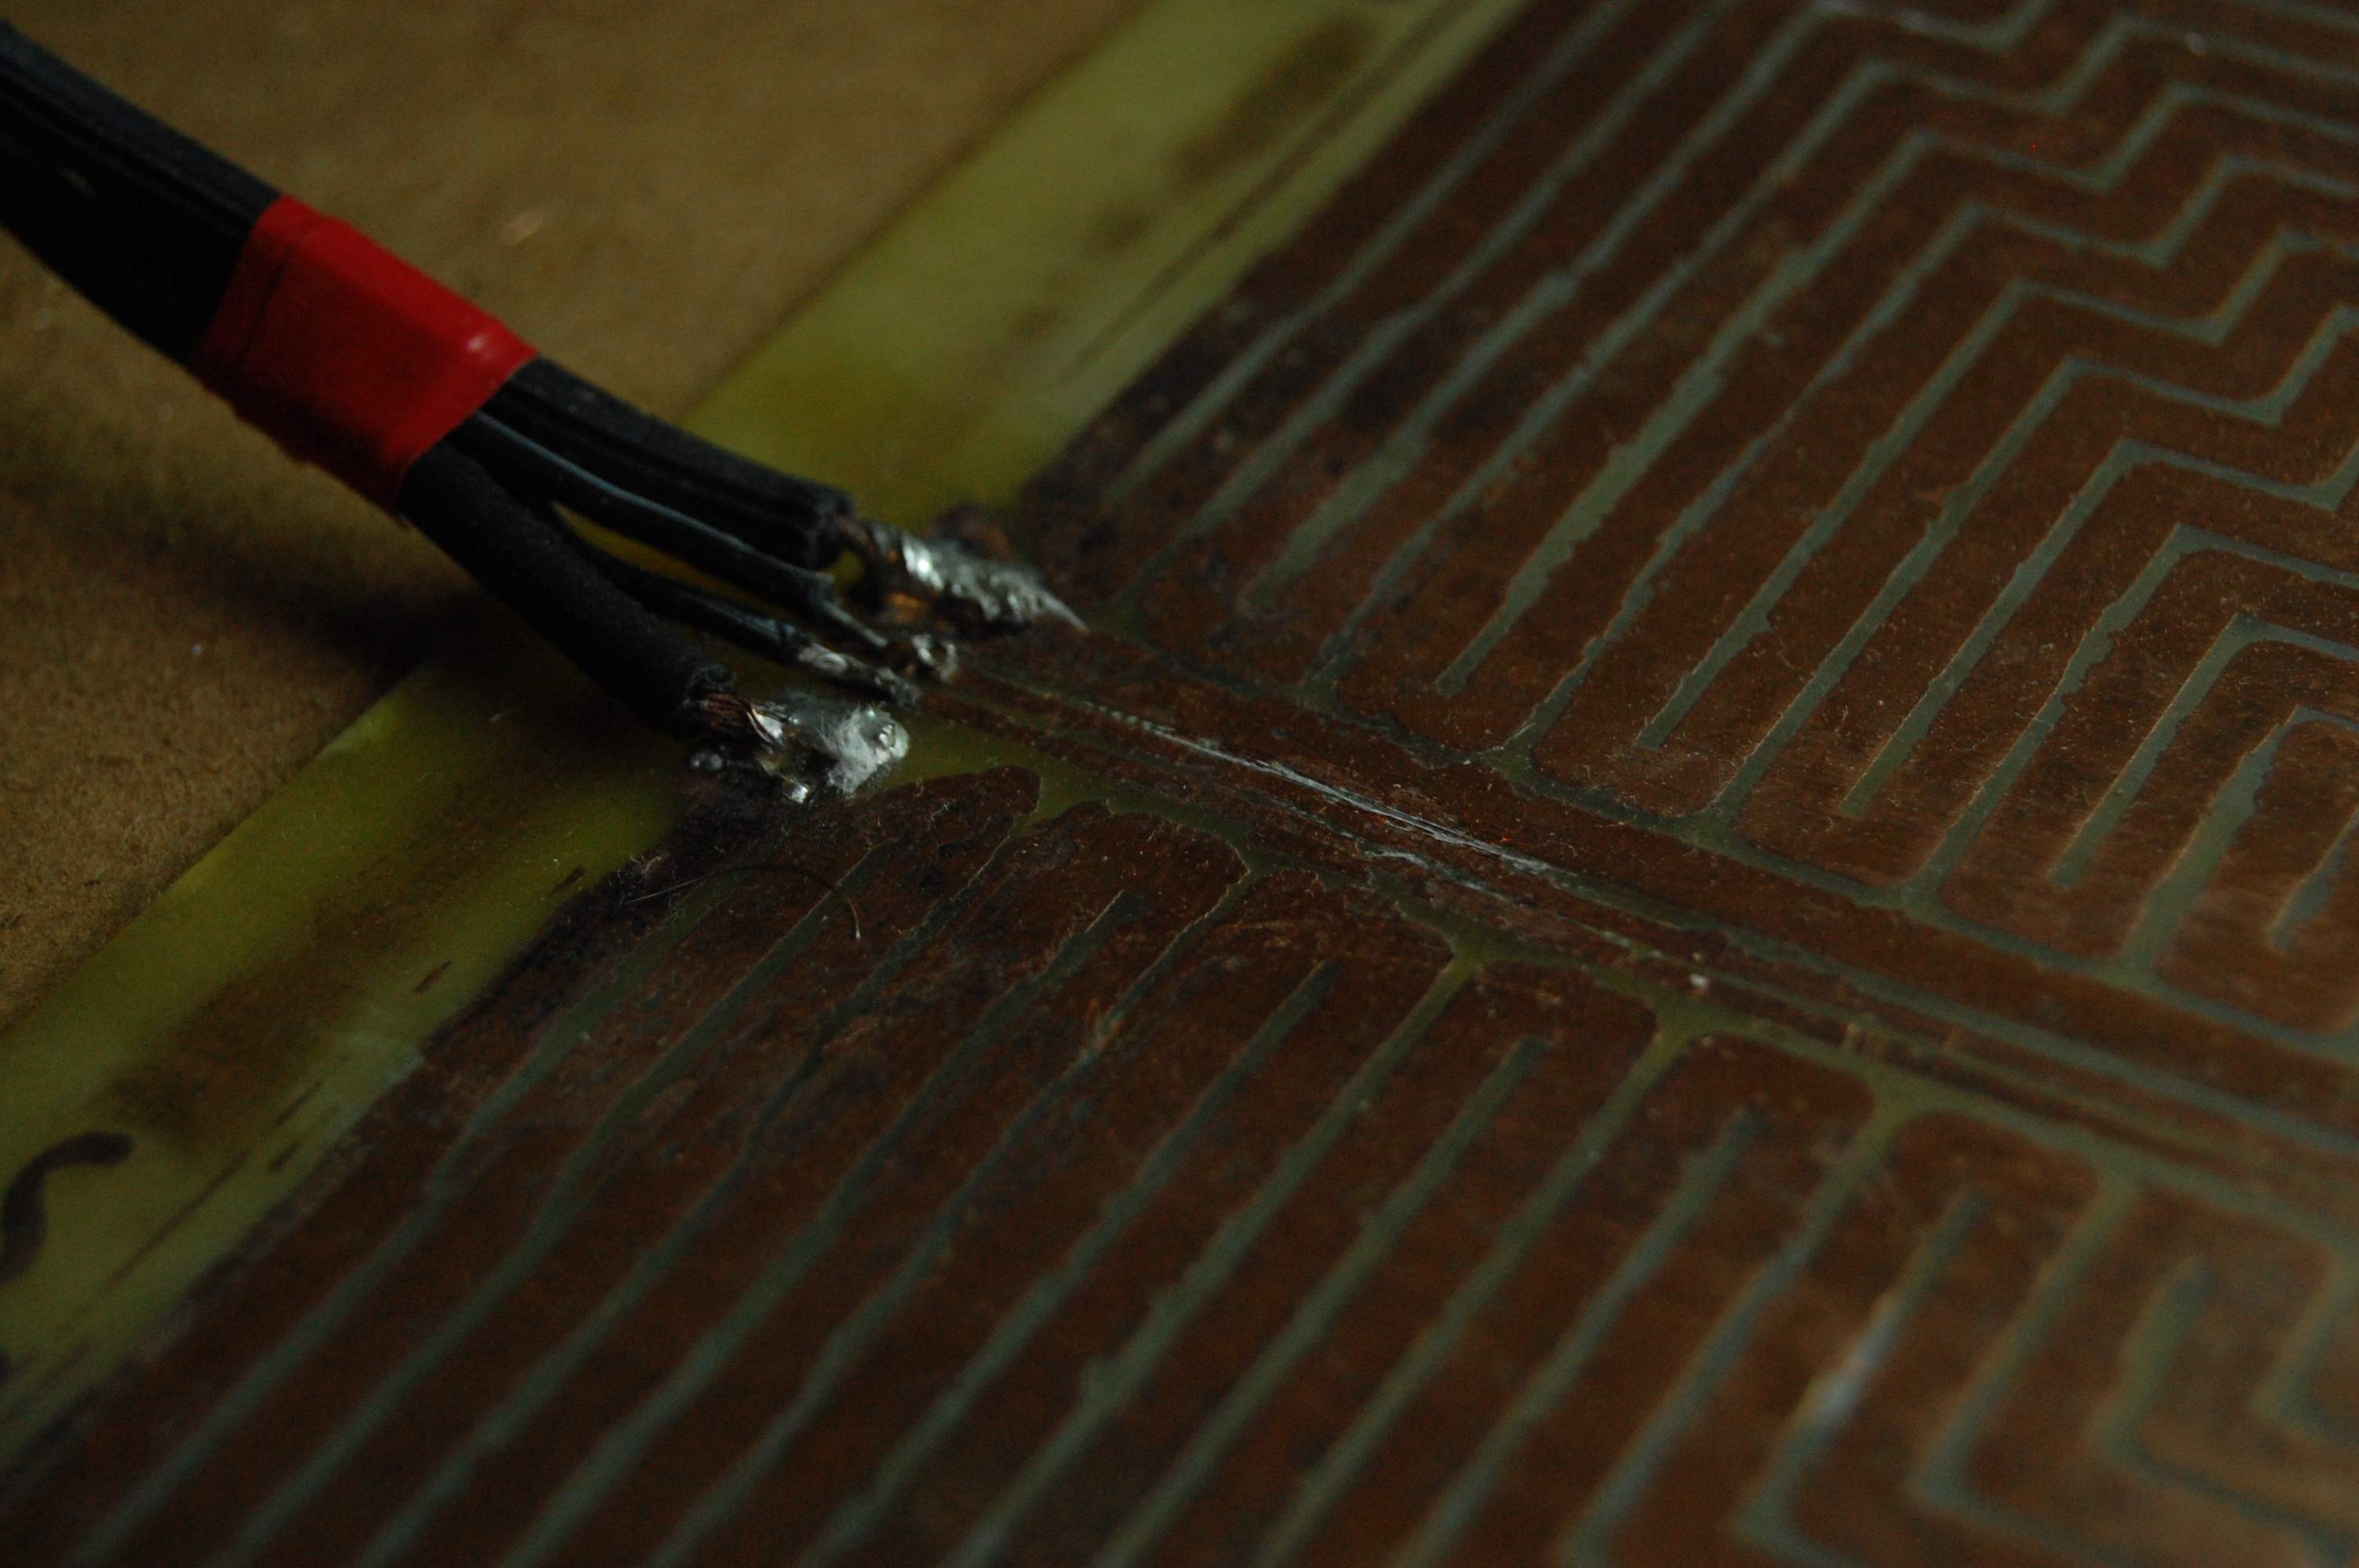
For my second attempt, I replaced the toner on the board. The toner transfered well in most areas, but peeled around the edges. I'm not sure if I did a poor job, or if thermal expansion of copper broke the toner bond. Regardless, Sharpie patched up the missing bits. I also switched to 50/50 HCl and H2O2. It worked beautifully. The acid ate through what remained of the copper in about 10 minutes, and I fished the board out with tongs. The thermistor was easy to solder on, and the power leads weren't much harder.
While I was testing the bed, I noticed that the four quadrants have different temperatures. Presumeably, the vinegar solution etched some areas thinner than others without breaking any traces. It's only 10°C or so, and I'm not too concerned.
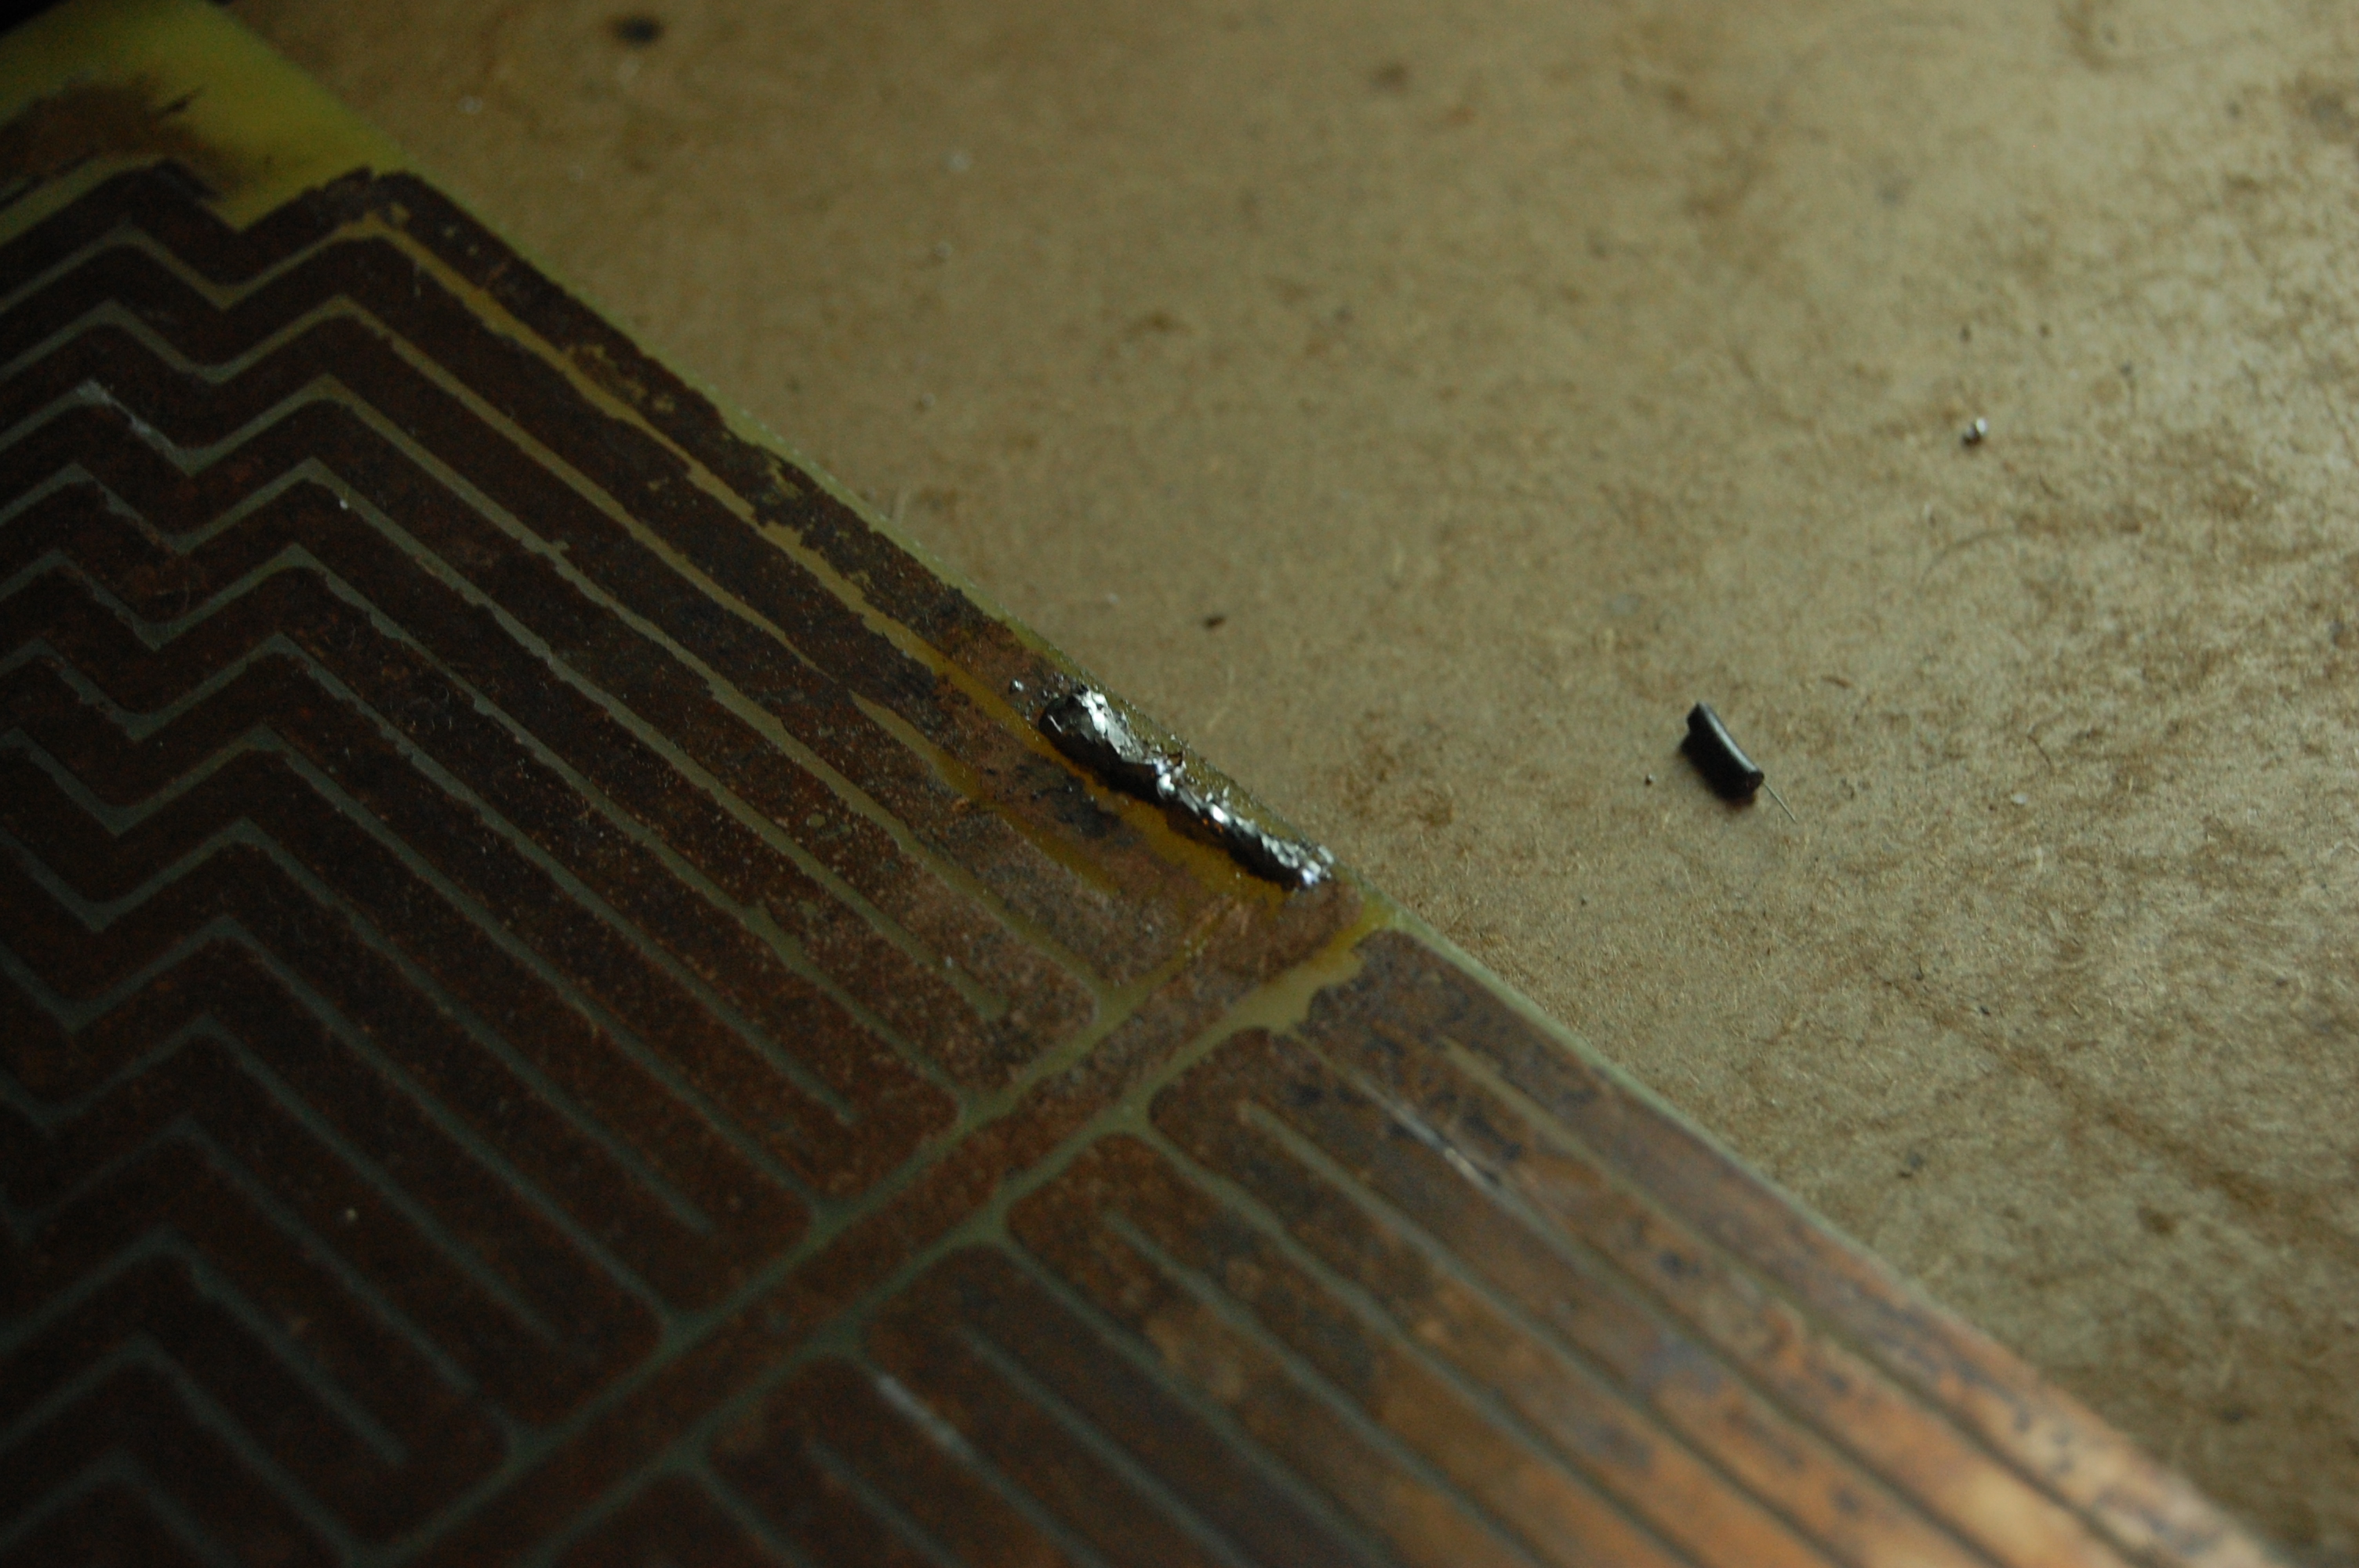
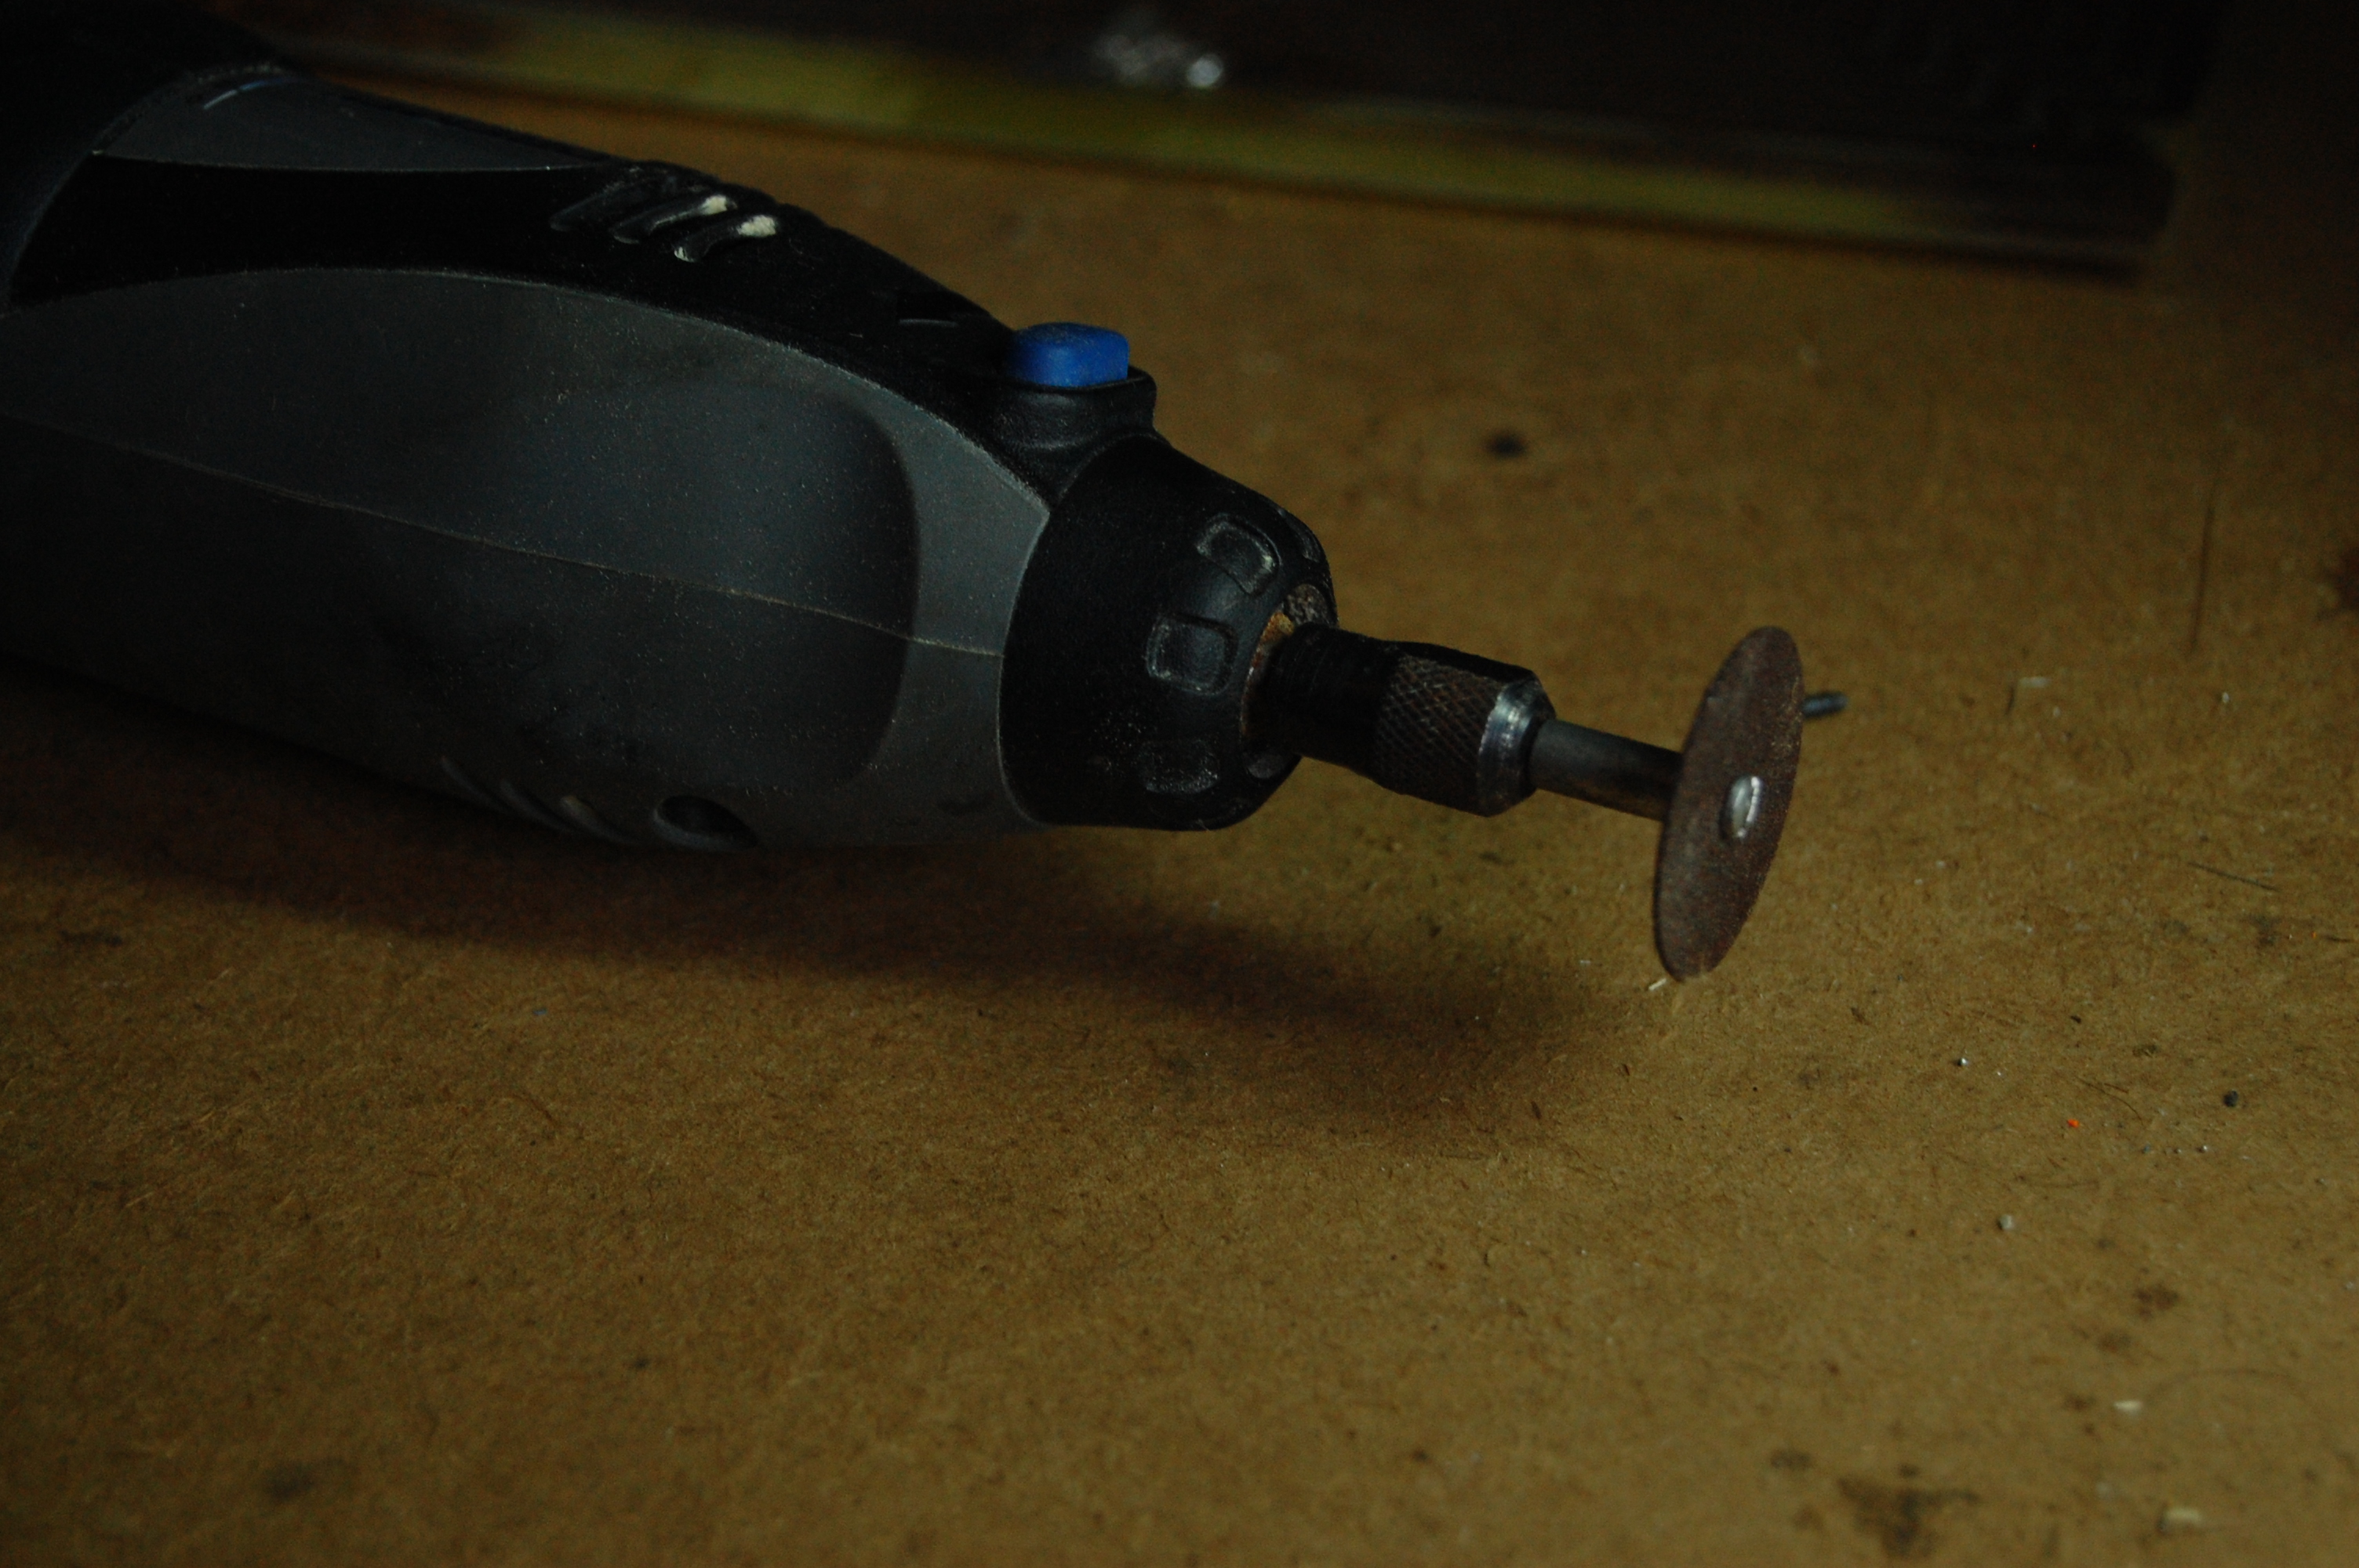
I looked over the board and found an partial bridge between the thermistor and the heater traces. It wasn't much (my multimeter reported 0.3Mohms between the heater traces and the thermistor traces). I sliced through that with a Dremel sanding disk. (That's my favorite attachment; it's the only one garuanteed to blow up in your face.)
I mounted the PCB face down on MDF, after sanding holes in the MDF to accomodate my solder joints. The bed's held flat by a couple of binder clips (it does warp up towards the center). Hydraraptor had mixed success using FR4 (PCB material) as a print bed; I'll try it. If plastic won't stick, I'll add a layer of glass. That's the popular way.
Bad: Steppers
While not nearly as interesting as the good news, it is frustrating. I just broke another stepper driver board.
It came in the mail yesturday, practically bursting with that new electronics smell. I soldered it together, with the header pins lined up just so. Then I dropped it into the RepRap and turned everything on.
The printer didn't work: I'd installed the board backwards and broken it. It continued not working as I tried the board on other motors.
Alas, poor driver. I hardly knew thee. On the bright side, I have a lovely three-axis machine. It just won't extrude.